Install on-premises Windows service - BIS Azure Service Bus
Application task
Install the BIS Azure Service Bus as Windows service on the external on-premises server.
To install the BIS Azure Service Bus, first download the BIS Azure Service Bus.zip file.
Standard procedure
| 1. | Open the on-premises server. |
| 2. | In 'C:\Program Files\', create a folder named 'BIS Azure Service Bus'. |
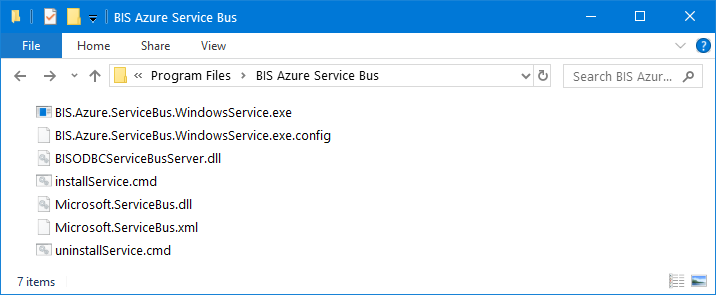
| 3. | Extract the 'BIS Azure Service Bus.zip' file and copy the files to the 'C:\Program Files\BIS Azure Service Bus' folder. |
|
|
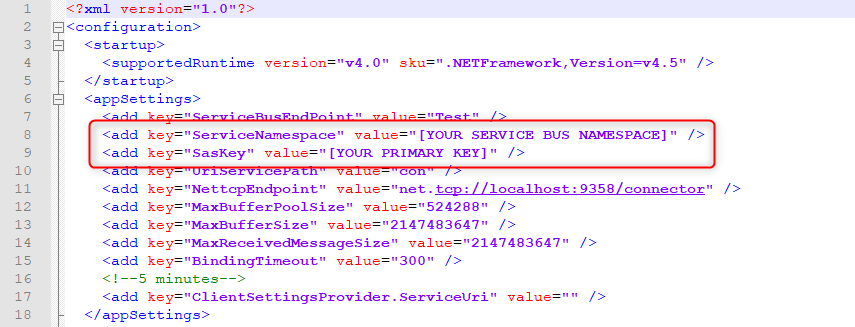
| 4. | Open the 'BIS.Azure.ServiceBus.WindowsService.exe.config' file with a text editor and replace:
|
|
|
| 5. | To install the BIS Azure Service Bus Windows service, run the 'installService.cmd' file from the Command Prompt. |
| 6. | Open the installed service in Computer Management. |
| Open Computer Management, in the navigation pane, click Services, and open 'Business Integration Solutions - Azure Service bus Connector'. | |
| 7. | On the Log On tab, fill in a service account with access to the on-premises database and the relevant password. |
| 8. | Click OK |
Notes
Errors and warnings for the BIS Azure Service Bus Windows service are logged in the Event Viewer > Windows Logs > Application event log of the on-premises server.
| Related to | Notes |
|---|---|
|
Set up Azure Service Bus for ODBC connection |