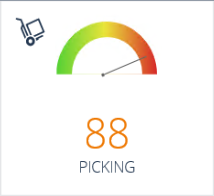
For each process, you can set up a counter that is shown on the process tile on a menu.

A counter can give information on, for example, the workload or the escalation level of the process.
For each counter, a query is required to get the relevant data.


Designer Designer Start Start Does the required  query already exist? Does the required  query already exist? Create query Create query You can use a query to get the relevant data:To be shown in a configurable grid.For the predefined 'Query' action that is used on an event procedure.For a counter.To configure a query, you can use the Create query wizard. Procedure 1. Click Mobility design. 2. Click Create query. 3. Sub-task: Define the basic settings for the query. 4. In the Query field, type a value. 5. In the Application field, enter or select a value. 6. In the Number of records to show in preview field, enter a number. 7. Select Yes in the Select only first record field. 8. Select Yes in the Allow cross company field. 9. Click Next. 10. Sub-task: Select the applicable tables for the query. 11. In the Tables pane, select the tables to be added to the query. Note: You can select and add several tables in one go. The root table of the query always must be at the top of the list of selected tables. To make sure this is the case, you are advised to first select and add the root table. Then you can select and add other required tables in one go. 12. Click >. 13. Except for the root table, for all tables you must define the parent table. In the Parent field, enter or select a value. Note: You can only select a table as parent if it is also in the table selection of the query. 14. Click Next. 15. Sub-task: Review or add table relations. 16. In the left pane, find and select the desired child table. 17. Click Add. 18. In the Child field field, enter or select a field from the child table. 19. In the Parent field field, enter or select the related field from the parent table. Note: For each relation, you can define the relation settings: Query fetch mode, JOIN type, Level. 20. Click Next. 21. Sub-task: Select the fields to be shown for the query. 22. In the left pane, find and select the desired table. 23. In the Select query fields pane, find and select the desired fields to be added to the query. 24. Click >. Note: You can use the Up and Down buttons to arrange the fields in the desired sequence. 25. Select the Group by check box. 26. In the Aggregate field, select an option. 27. To review the query results in the preview, click Refresh. 28. Click Next. 29. Sub-task: Define ranges for the query. 30. In the left pane, find and select the desired table. 31. In the middle pane, find and select the fields for which you want to add a range. 32. Click >. 33. In the Condition field, select an option. 34. For each added field, set the value for the condition. To set the value, you can use a variable, a function, or a fixed value. In the Value field, enter or select a value. Note: You can only use variables and functions that are applicable for the application to which the query is assigned. 35. To review the query results in the preview, click Refresh. 36. Click Finish. Notes A query is application specific. You can view the available application queries in several ways, for example on the Queries tab of the Mobility design workspace. Set up counter for process Set up counter for process For each process, you can set up a counter that is shown on the process tile on a menu.A counter can give information on, for example, the workload or the escalation level of the process.To set up a counter, you need a:Query to get the relevant data.CSS class to define the appearance of the counter on the process tile on the menu.These predefined counter CSS classes are available:CounterLeftBottom (UI_Anywhere_Counter-leftBottom)CounterLeftTop (UI_Anywhere_Counter-leftTop)CounterRightBottom (UI_Anywhere_Counter-rightBottom)CounterRightTop (UI_Anywhere_Counter-rightTop)These CSS classes show a small counter number on the process tile. The counter number is shown in one of the corners of the tile.Example CounterLeftTop:CounterLargeCentre (UI_Anywhere_Counter-large)Shows a big counter number centered on the process tile.Example:CounterAnalog(UI_Anywhere_Counter-analog)Shows both a counter number and a gauge on the process tile. The gauge shows the counted number expressed in a percentage. The percentage is calculated based on the counter range.For the gauge to work properly, you must enter this in the Custom style attributes field: counterRangeColors(#56d134, #eae43a, #d62828) counterRange(0, 100)By default, the counter range is set to 0, 100. You can change these range numbers. In the example, the colors to be shown on the gauge are green, yellow, and red. You can change these colors to any color (in HEX code).Example: Procedure 1. Click Mobility design. 2. Click the Processes tab. 3. In the list, find and select the desired record. 4. Click Edit. 5. Click the General tab. 6. Select Yes in the Use counters field. 7. In the Query for counters field, enter or select a value. 8. In the CSS for counters field, enter or select a value. 9. In the Custom style attributes field, type a value. 10. Close the page. End End

Activities

Name Responsible Description

Create query

Designer

You can use a query to get the relevant data:
  • To be shown in a configurable grid.
  • For the predefined 'Query' action that is used on an event procedure.
  • For a counter.
To configure a query, you can use the Create query wizard.

Set up counter for process

Designer

For each process, you can set up a counter that is shown on the process tile on a menu.
A counter can give information on, for example, the workload or the escalation level of the process.
To set up a counter, you need a:
  • Query to get the relevant data.
  • CSS class to define the appearance of the counter on the process tile on the menu.
These predefined counter CSS classes are available:
  • CounterLeftBottom (UI_Anywhere_Counter-leftBottom)
    CounterLeftTop (UI_Anywhere_Counter-leftTop)
    CounterRightBottom (UI_Anywhere_Counter-rightBottom)
    CounterRightTop (UI_Anywhere_Counter-rightTop)
    These CSS classes show a small counter number on the process tile. The counter number is shown in one of the corners of the tile.
    Example CounterLeftTop:
  • CounterLargeCentre (UI_Anywhere_Counter-large)
    Shows a big counter number centered on the process tile.
    Example:
  • CounterAnalog(UI_Anywhere_Counter-analog)
    Shows both a counter number and a gauge on the process tile. The gauge shows the counted number expressed in a percentage. The percentage is calculated based on the counter range.
    For the gauge to work properly, you must enter this in the Custom style attributes field: counterRangeColors(#56d134, #eae43a, #d62828) counterRange(0, 100)
    By default, the counter range is set to 0, 100. You can change these range numbers. In the example, the colors to be shown on the gauge are green, yellow, and red. You can change these colors to any color (in HEX code).
    Example:

Provide feedback